Buying a home golf simulator can feel exciting and overwhelming at the same time. With dozens of brands, hundreds of models, and setup requirements ranging from tiny garage rooms to dedicated basements, the decision can quickly become confusing. Most buyers start by looking at specs or price, but the reality is that the perfect simulator is determined by a combination of space, goals, budget, and setup considerations.
In this guide, we’ll walk through everything you need to think about before buying, so you can avoid mistakes, maximize your investment, and choose a simulator that truly fits your space and needs.
1. Understand Your Room Dimensions
Most people focus only on ceiling height, but there’s more to consider:
-
Height: The absolute minimum height depends on your swing and clubs. Drivers need at least 8 feet for average-height golfers; taller players or full swings may need 9–10 feet.
-
Depth: Launch monitors need enough distance to track shots accurately. A depth of 10–12 feet is common for compact setups, but some systems can work with as little as 8 feet.
-
Width: Give yourself 2–3 feet of clearance on each side to avoid hitting walls or enclosures.
-
Extra considerations: Doorways, lighting, and ceiling slope can all affect setup.
Tip: Sketch a floor plan and mark swing radius, screen placement, and launch monitor location. This avoids costly surprises after purchase.
2. Decide Between Partial vs Complete Packages
Not all simulators are sold as all-in-one setups. Here’s what to know:
-
Complete packages: Include launch monitor, mats, impact screens, projectors, and sometimes software. Examples: SkyTrak ST+ Studio, RSG One. These are ideal for buyers who want “plug-and-play” setups.
-
Partial packages: Include only the monitor, leaving you to source accessories separately. Examples: SkyTrak ST+ (no monitor version), Garmin R10. This is good for buyers who already own mats, screens, or projectors, or want to customize.
Takeaway: Knowing the package type upfront helps you understand the real cost and what additional purchases might be required.
3. Understand Your Goals
Before buying, define what you want from your simulator:
-
Skill improvement: Are you tracking swing metrics, launch angles, or ball spin? Systems like Uneekor and TrackMan are designed for advanced data analysis.
-
Entertainment and fun: Are you playing virtual courses with friends or family? Systems like Red Stakes Golf (OptiShot) or SkyTrak provide realistic play without pro-level data.
-
Mixed use: Many golfers want a setup that allows serious practice and virtual rounds. This affects software choices and whether you need high-end projectors or screens.
Tip: Rank your priorities — this will guide you toward entry-level, mid-range, or premium setups.
4. Match Your Simulator to Your Budget
Simulators vary dramatically in cost:
-
Entry-level: Red Stakes Golf / OptiShot, Garmin R10 ($500–$1,500). These provide basic shot tracking and virtual courses, ideal for casual or beginner golfers.
-
Mid-range: SkyTrak, GolfBays bundles ($2,000–$7,000). Accurate launch monitors, realistic ball flight, and software options for skill improvement.
-
Premium / Professional-grade: Uneekor, TrackMan, GCQuad ($10,000–$50,000+). Elite-level accuracy, advanced analytics, and full studio setups for coaches or serious players.
Pro tip: Don’t focus solely on the price of the monitor. Consider all accessories, software, and setup costs — mats, screens, projectors, enclosures, and room modifications can add thousands.
5. Consider Software and Course Access
The software often determines whether your simulator is engaging or frustrating:
-
Course libraries: Most simulators include hundreds of virtual courses, but some limit selection without paid upgrades.
-
Practice modes: Driving range, short game, putting, skill challenges, and game analytics vary by system.
-
Third-party integration: Some monitors connect with apps like WGT, E6 Connect, Home Tee Hero for virtual rounds or tournaments.
Takeaway: Ensure your chosen simulator supports the features and courses you actually plan to use.
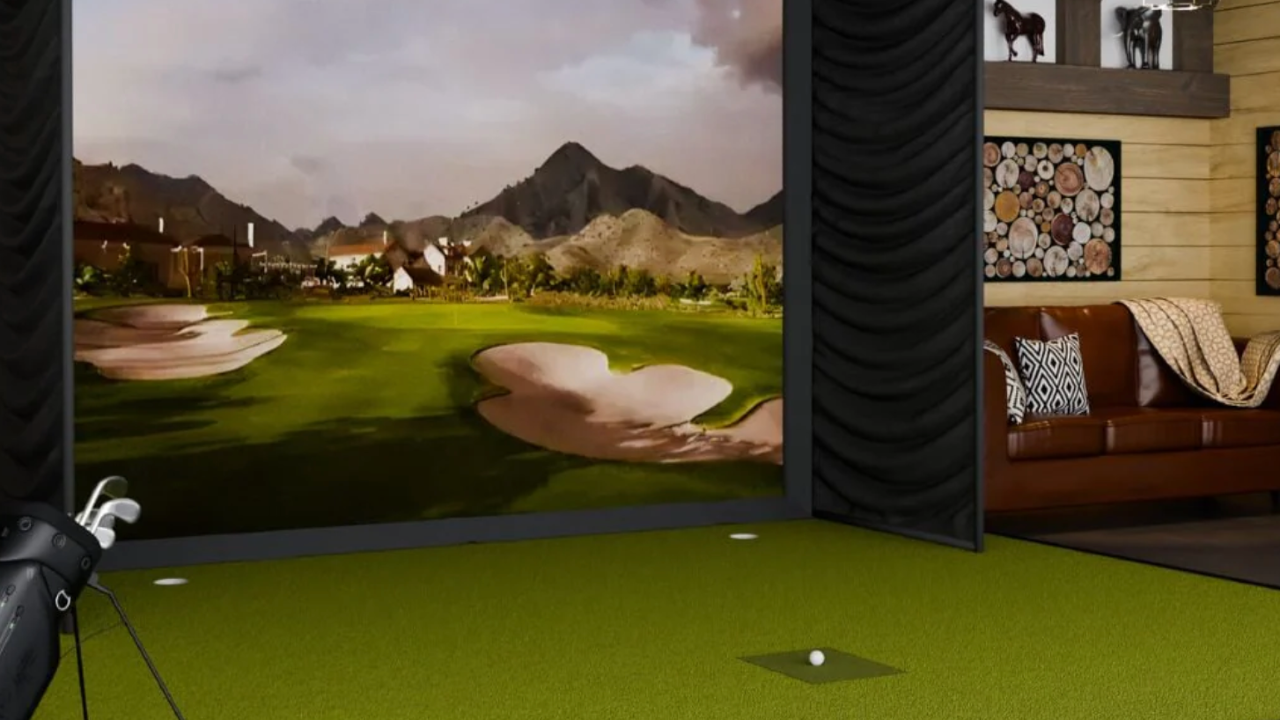
6. Accessories Are Not Optional
Even the best monitor is only as good as its environment. Essential accessories:
-
Impact screen: Absorbs ball strikes and projects virtual courses.
-
Hitting mats: Quality mats protect clubs and provide realistic turf feel.
-
Projectors & lighting: A high-resolution projector and even lighting make rounds immersive.
-
Enclosures / nets: Keep balls contained and protect walls.
Pro tip: Modular accessories allow upgrades without rebuilding the studio — start with essentials and expand over time.
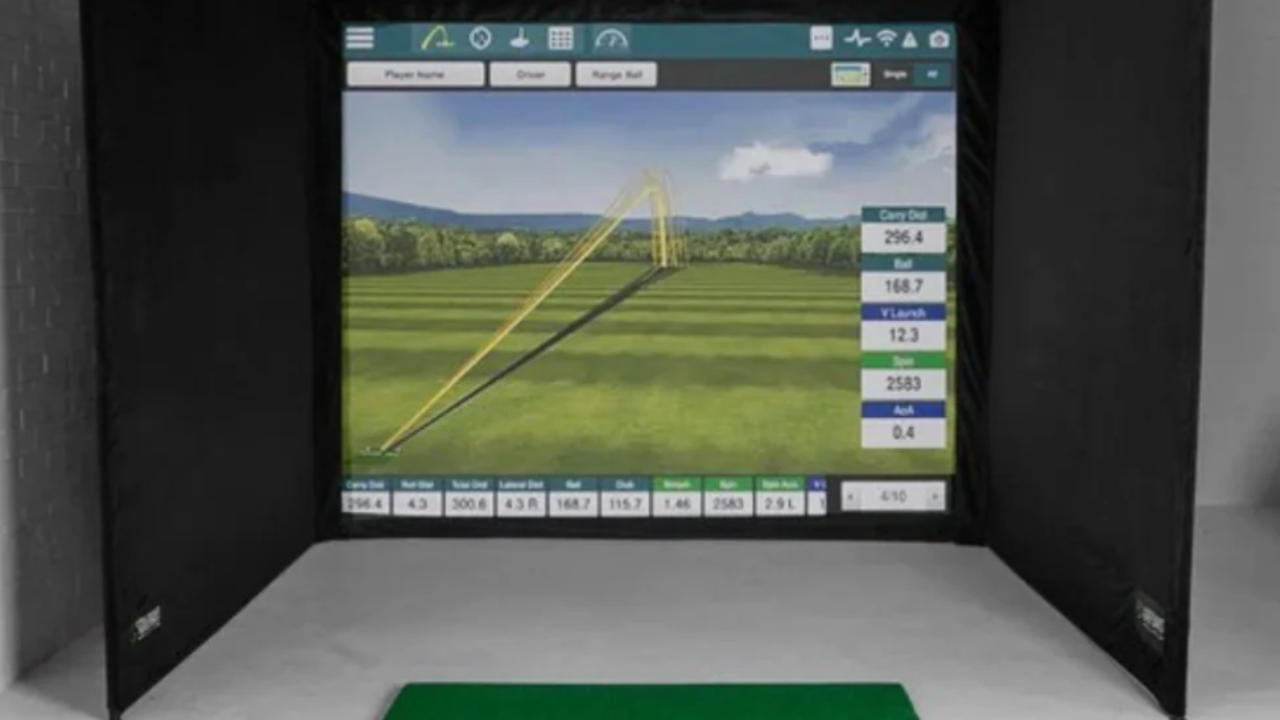
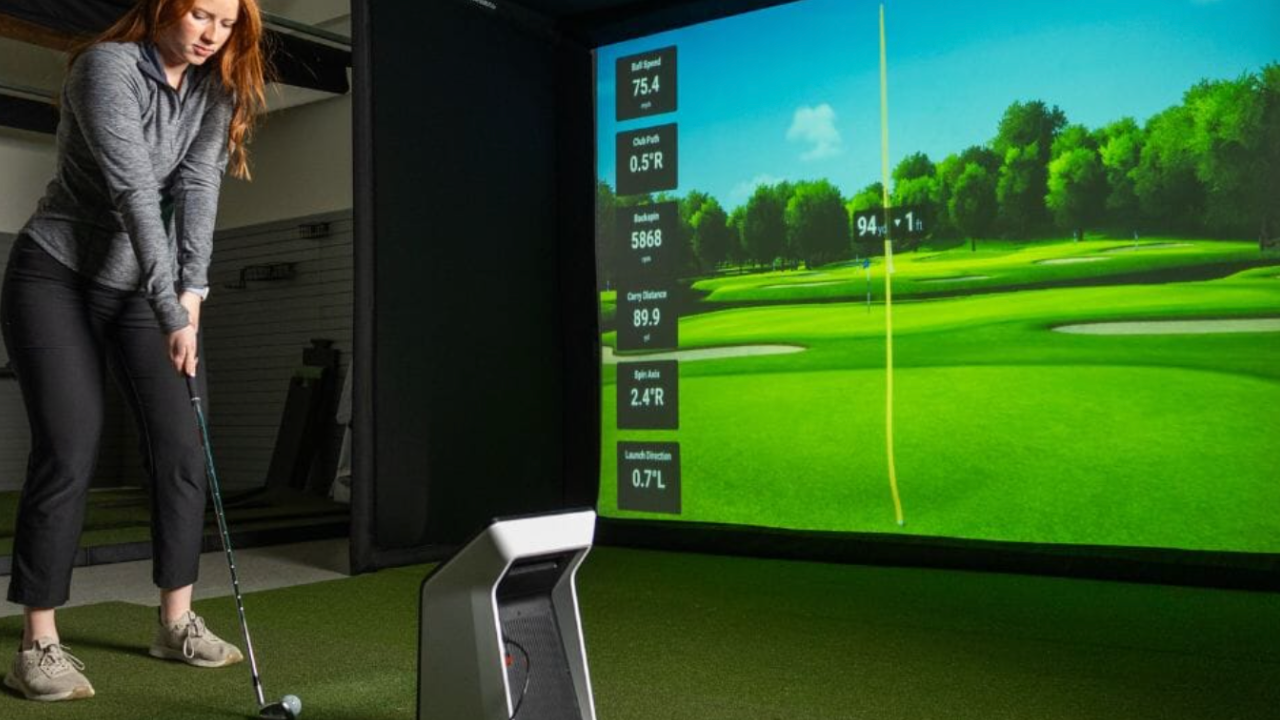
7. Pay Attention to Accuracy and Data Requirements
Different systems measure ball flight differently:
-
Photometric systems (SkyTrak, Uneekor) use cameras to track ball flight. Accuracy can vary based on lighting and placement.
-
Radar systems (TrackMan, GCQuad) provide detailed shot data but need proper spacing and ceiling height.
-
Budget monitors (OptiShot/Red Stakes) give general metrics suitable for practice but aren’t as precise for spin and launch angle.
Takeaway: Choose a system that matches your goals: casual play vs professional analysis.
Conclusion
Choosing the perfect golf simulator isn’t just about specs or price — it’s about understanding your space, goals, and what comes in the package. Taking the time to plan your room, assess your practice needs, and consider accessories and software will save you frustration and ensure you get maximum value from your investment.
If you want to explore curated options for every skill level and budget, visit our [Home Golf Simulator Directory]. You’ll find full packages, partial setups, and detailed comparisons to help you make a confident decision.